Thursday, July 25, 2013

A Little Closer!

This is the casating I wanted to try a bit of evaporation on to. Its made of fastcast polyurethane and then spray-painted with gloss black.As the Al coating has no filling qualities the gloss of the coating is a result of the texture of the base.
I picked up a few aluminium prefused tungesten filiments from a company called Midwest Tungsten in the US of A. This is a bit overkill for a DIYer but the were cheap, from their surplus bin!

 
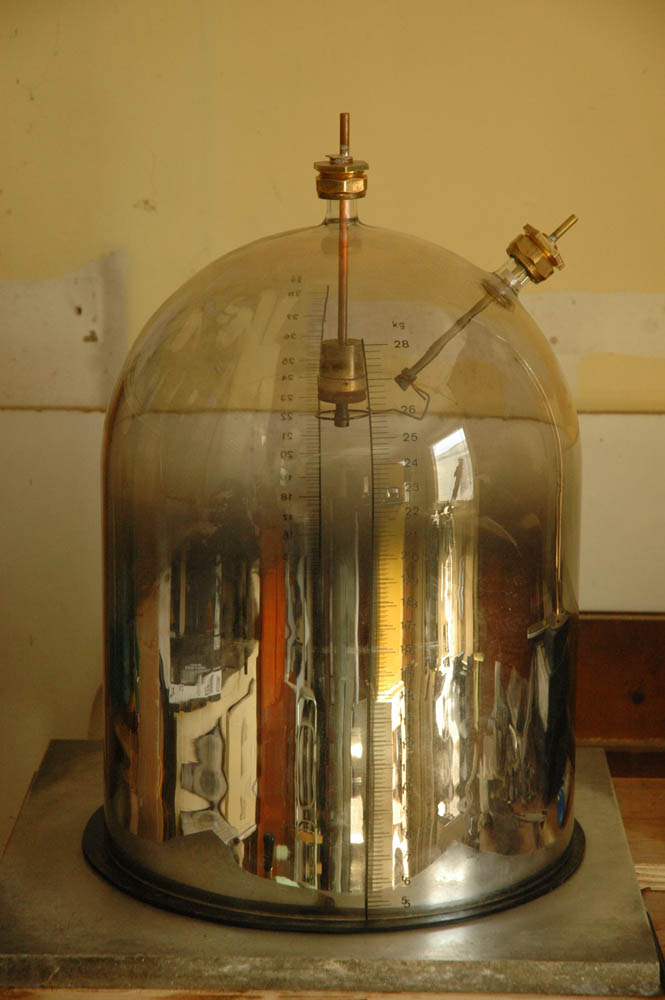
So I hung the plastic part from a wire inside the bell and began to pump down...
When I got to 40micron or so I turned on the MOT power supply.(I wrote this up in the blog a good while ago)
After 20 seconds I got this! I was delighted! Just mechanical pump, no diff. Now, its not up to scratch yet but these little victories help me keep the faith.(Ignore the electrodes poking through, they are just sealing the holes here)
A strange thing at this vacuum is the fact that the back of the part got a covering of Al. as well. It must fly around in the belljar at these crappy vacuum levels.
 There is the front. Opaque but not bright. It has greyness in person. Getting there...

Monday, June 10, 2013

I found a leak!

After a long absence from my metalisation project I decided to get back to it. I was having a real nightmare with my belljar not getting the vacuum level I was expecting. Or that I needed to even start a diff pump. There were so may potential leaks I was overwhelmed for a while. So I decided to go step by step and eliminate the possibilities starting at the pump.
Flexible pipe tested fine, under water with compressed air. The second section however had a f**king leak. Right there, bubble, bubble, bubble. I couldn't believe it. The solder joint looked fine but it was leaking.
So I Glyptaled it under a vacuum and I was all fixed up!
More to follow...

Wednesday, November 14, 2012

Copper bellows again


I decided I wasn't going to let the peskey bellows defeat me, so I went for it again. My copper bellows MkII are a success! Here's what I did...

As before, I made a wax model on the lathe. This time I stuck to the rules I mentioned in my other copper bellows effort above.
So my recesses are tapered and wider than they are deep.
Wired, dipped in white/mineral spirits, covered with graphite powder. After a bit, burnished with a Qtip with more graphite on it.
Copper plated at very low current.
Below is the bellows just out of the plating solution.
It had two sessions in the plating solution. One to get the form strong enought to survive a bit of handeling and the burn-out. And another to build up a decent thickness of metal. 

Another warning note here: I was calculating on the assumption that the solution was putting down 1 micron every 2.5mins, as I read in the literature.

But even after 6/7 hours I only ended up with 150 microns or so. Measured from the waste I cut out of the top of the form. I'm sure the vertical parts of the cylinder are thicker but the important flexing parts are only that thick, if not less. I would like to have gotten .3mm or even more. As there is serious strength,brittleness and porosity issues with simple electroforming like this.

I realised later that the problem was that even though I had calculated my current density ok, I was using voltage control to achieve it. So my overall power/wattage was less than it should be. Hence the thin deposit.


Friday, July 13, 2012

Very Expencive Beer Mat


I know this is off topic again but...

Just a quick post of a couple of pictures of a thing I cut with my homemade CNC today. This started life as a drawing which I photographed and vectorized. Then CAMed and routed. I'm very happy with the results. Size 120mm dia.

The reason for this piece is partly promotional and also I'm tring to see what my machiene can do!
I'm delighted with how this turned out.

Tuesday, June 26, 2012

Copper Bellows. A lesson for me.

I'm trying to eliminate leaks in my(still not working) laser so I decided to go for copper bellows instead of my current O-ring seal for mirror adjustment.
But I couldn't find any copper bellows, so I decided to give it a shot and see if I could make a pair.
After first considering soldering them up from parts, I decided to electroform.

Here is a picture of my wax mandrel. It is made from injection moulding wax. It turns ok if you don't try to take too much off in one go.
I then cut the recesses or corrugations or what ever you would call it. With the piece still spinning, I hit it with a touch of a gas flame to soften the corners and give me a nice smooth finish.


I parted off and heated a bit of copper wire and stuck it in to the end. Then I was ready for conductive coating.
There are a few options here. Sputter, chemical silver, electroless copper, conductive paint, graphite.
I decided to go with graphite because it was the simplest and I had it at hand.

 So I dipped the wax in "white spirit" for 20 seconds and drained it. Then the surface of the wax was slightly sticky.
Then I bunged it in graphite powder. I made sure it was all covered before the white spirit flashed off.
After a minute I brushed the excess powder off with a makeup brush.
A very important note here is that burnished graphite powder is significantly more conductive than non burnished.
Just rubbing with the bristles of an artist paint brush is enough to burnish it.
I need to reach into the interior ring to burnish the graphite there before it would plate properly.


 Here it is beginning to get its initial copper coating. Nice!

I electroformed for 8 hours giving me 8*24microns so 0.2mm in theory!
 Measuring the bare wire versus the electroformed part confirmed the thickness.
 I drilled and melted out the wax.

I then very carefully annealed the tube, in the process evaporating the remaining carbon. I pickled
and ultrasoniced the remaining crud off.

And then disaster!! The inner rings were so thin that they cracked in the ultrasonic. They came out with some small holes and
crack lines.
I had always planned on re electroforming inside the tube as I thought they would be a little thinner. But they are significantly thinner and quite brittle.

So I placed a copper pipe electrode into my copper plating solution and began plating from the inside.
After another 4 hours...
 I ran the ends on the belt sander to clean them up...
 And tin/lead soldered it together. Ta da, one flexible mirror mount!


In retrospect I would do this differently. I had a huge problem with the shape of the mandrel causing different plating thickness
I bet anyone with plating experience could have seen that coming. So for the next electroformed copper bellows I will follow these guides:
  • Interior corrugations must be wider than they are deep.
  • Returns must be angled to face the electrode for copper plating reasons.
     

Saturday, March 31, 2012

Cheap grease

Look, its non silicone high vacuum grease that doesn't cost alot like Apiezon does! I got this over the phone from a lab suppliers in the UK.

Water Cooled Magnetron. A go go.

I decided to try a water cooled magnetron. My Oil Burner Ignition Transformer is rated 8000v at 34mA so thats.....8, 3s are 24.... 250watts or so. Enough to get hot in a vacuum I would think. So I made an inner brass cylinder to fit around my deep pot magnet from .5mm sheet and silver soldered it. I then made two rings of 4mm dia wire, these fit over the inner cylinder. Then an outer cylinder, brass silver soldered. I then soldered it together. The lovely copper pipe to get the water in, came from Halfords. I'm not sure why they sell it but I suspect something on the break line of cars.
So I flared the ends and drilled 4mm holes in the sleeve and soldered the pipe in place. Fingers crossed its water tight...


The seal around the inlets on the belljar is just an o-ring Wilson Seal style. Its a standard plumbing fitting altered a bit on the lathe. It is necessary to remove the first 3mm or so of thread on the 'body' of the fitting in order to allow the 'nut' to pinch the o-ring enough. I also recut the inner bevel of the body of the fitting to 45 degrees or so. It seems to work well. Plus grease of course.

The anode here is a similar setup. The loop is iron wire, well no, its a welding rod so it's probably steel !